
Camera-Ready Kitchen Design
A camera-ready kitchen design is not a styling trick. It coordinates light, sightlines, storage, and 304 stainless steel structure so a luxury kitchen photographs beautifully after real use.
Direct answer
The Direct Answer
A camera-ready kitchen design works when light, sightlines, storage, and durable surfaces are planned together before styling. The goal is not a fragile showroom scene; it is a working luxury kitchen that still looks composed after cooking, cleaning, and hosting, with enough hidden utility to return to order quickly.
What is camera-ready kitchen design?
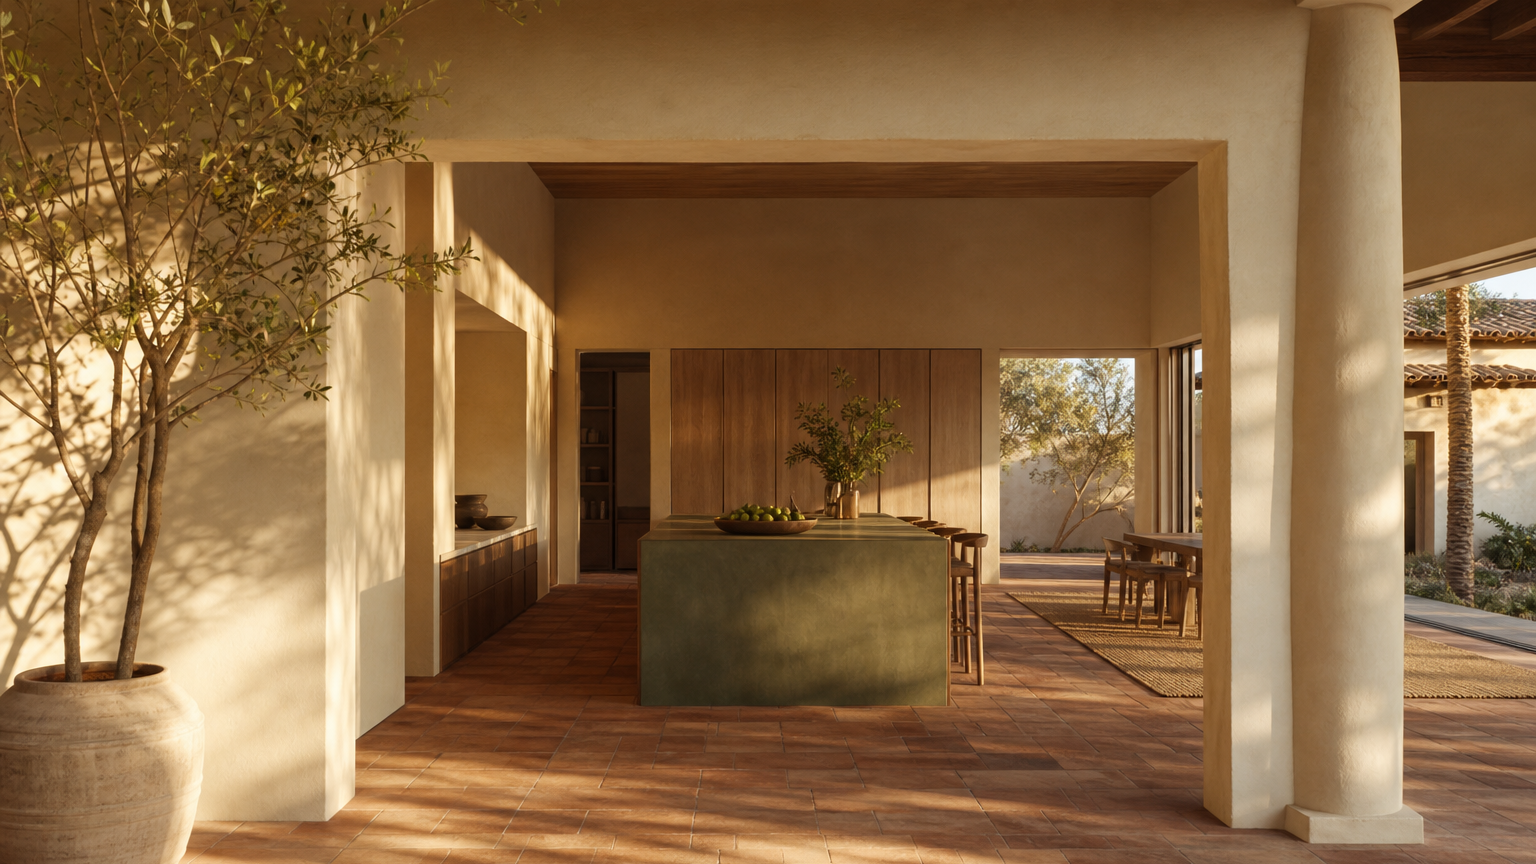
Camera-ready kitchen design is a planning method that makes a kitchen look composed in photographs while still working for cooking, cleaning, storage, and hosting. It starts before styling: the designer fixes sightlines, daylight direction, task lighting, cabinet rhythm, appliance concealment, and surface durability so the room reads clearly from the first doorway view and from the phone camera view. A shareable kitchen is not a fragile set. It is a working room with fewer visual interruptions, better light control, and materials that keep their finish after repeated use.
The direct answer is simple: build the room around light, camera angles, durable surfaces, and hidden utility first; choose decorative objects last. For Fadior, that means using 304 stainless steel cabinet bodies as quiet infrastructure, then softening the image with warm color, wood-grain finishes, stone counters, and controlled reflections. The result can look calm on a screen because the underlying plan is calm in daily life.
- Camera-ready kitchen design
- A residential kitchen planning approach that coordinates light, composition, surfaces, storage, and service access so the space photographs well and remains practical.
Why do photogenic kitchens often fail in daily use?
Photogenic kitchens fail when the image is designed faster than the room. A single hero angle can hide weak task light, poor landing zones, visible countertop clutter, or cabinet finishes that show fingerprints after the first meal. The camera rewards simple planes and clean lines, but the homeowner needs a place for small appliances, recycling, pantry overflow, cleaning tools, chargers, and serving pieces. If those functions are not planned, the kitchen only looks camera-ready on installation day.
The first test is a 30-day use test. If a family prepares breakfast, dinner, and weekend hosting in the room for 30 days, does the main view still look orderly without moving objects off-camera? If the answer is no, the problem is usually not styling. It is missing storage depth, poor appliance zoning, or a surface system that cannot tolerate frequent wiping. A premium kitchen should be photographed after use, not only before use.
| Decision | Looks good in a photo | Works after daily use |
|---|---|---|
| Single long sightline | Creates a calm first image from the doorway | Keeps circulation clear around island and dining zones |
| Warm directional light | Adds depth to cabinet faces and counters | Supports food prep, serving, and evening hosting |
| Concealed appliance storage | Removes small-object clutter from the frame | Keeps mixers, kettles, and chargers accessible |
| Durable cabinet body | Allows crisp planes and thin reveals | Tolerates moisture, cleaning, and repeated handling |
| Limited finish palette | Prevents a busy image | Makes replacement, maintenance, and future styling easier |
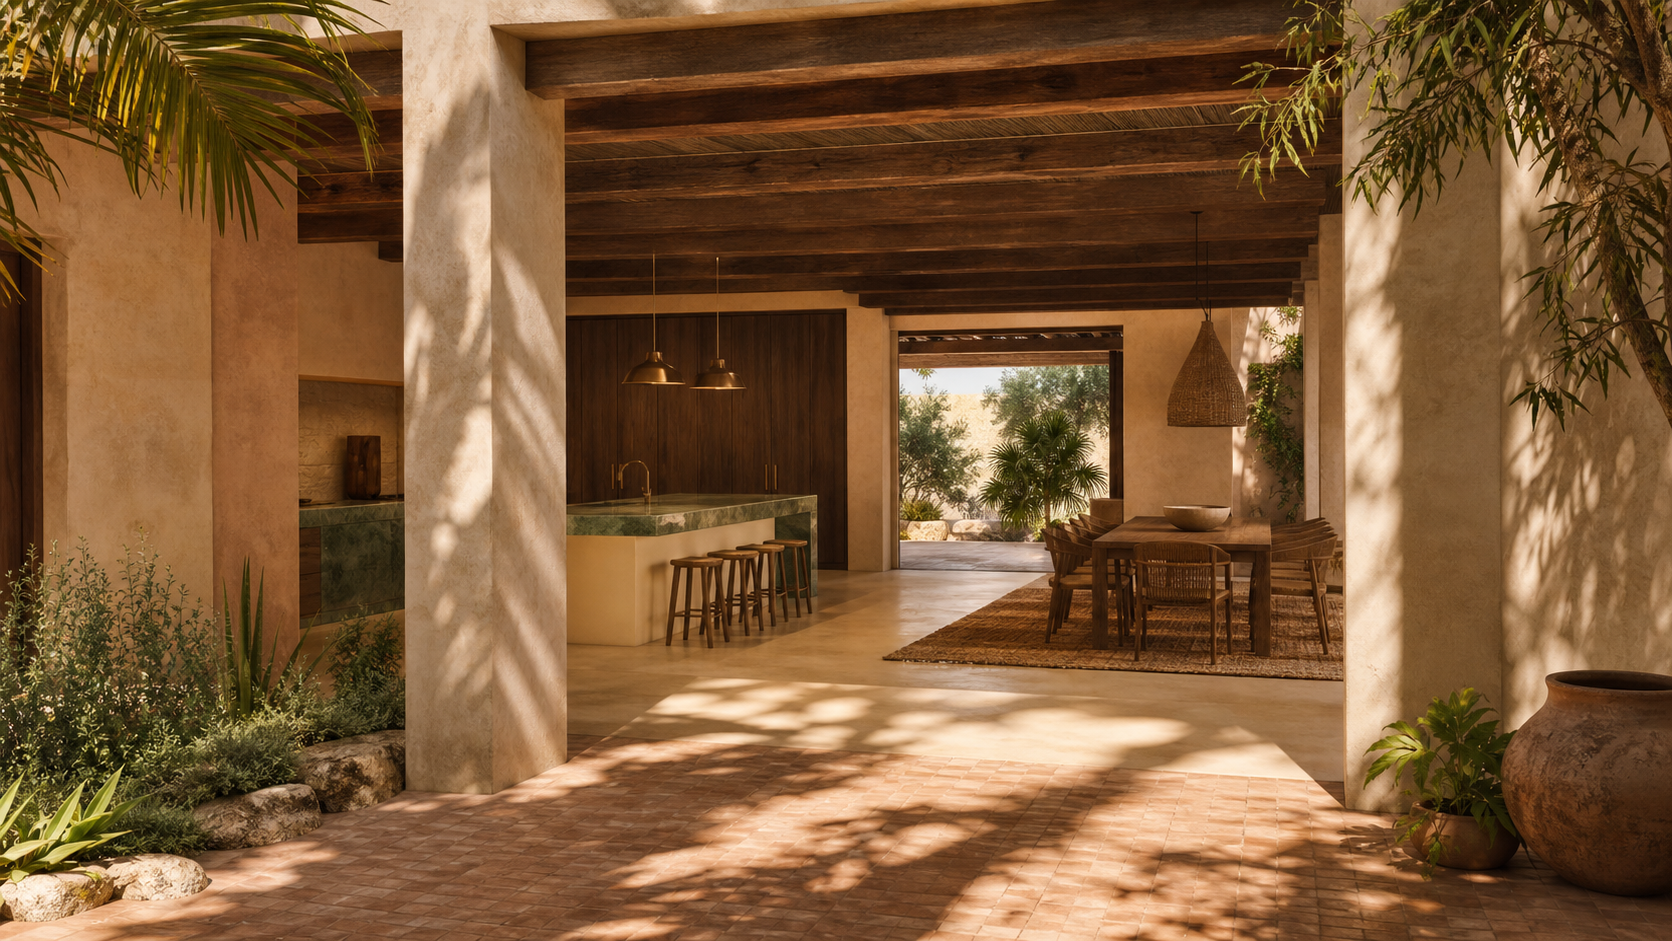
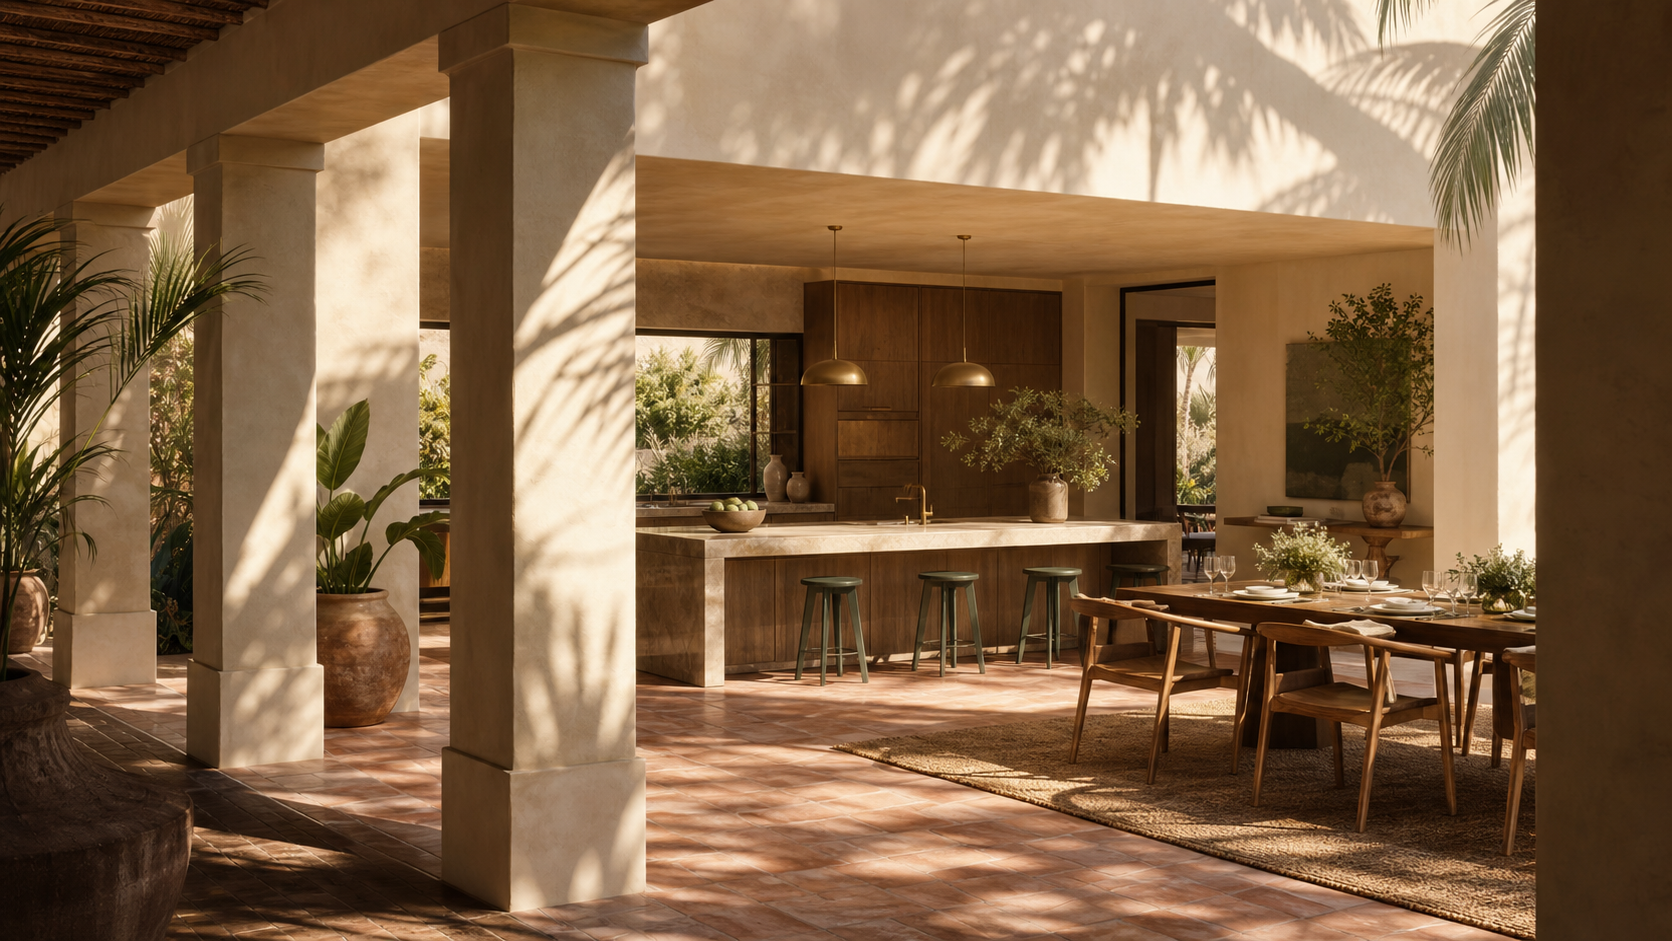
How should light be planned for a shareable kitchen?
Light controls whether a camera-ready kitchen feels natural or staged. The U.S. Department of Energy explains that color rendition is a key lighting quality because it affects how colors appear under a light source. In a kitchen, that matters for cabinet finishes, food, stone, metal accents, and skin tones at a dining counter. DOE lighting guidance also separates ambient lighting from task lighting, which is why a shareable kitchen needs more than a bright ceiling grid. It needs layered light: daylight or soft ambient light for the room image, focused work light for counters, and gentle accent light for shelves or niches.
A practical target is not one universal color temperature. It is consistency. If under-cabinet light, pendant light, and ceiling light fight each other, the camera records a restless room. For Fadior projects, the cabinet finish and countertop sample should be reviewed under the actual lighting plan before production sign-off. Stainless steel finishes, wood-grain transfers, pearl white coatings, and PVD tones can all shift under weak color rendition. A calm image starts with a truthful lighting mockup.
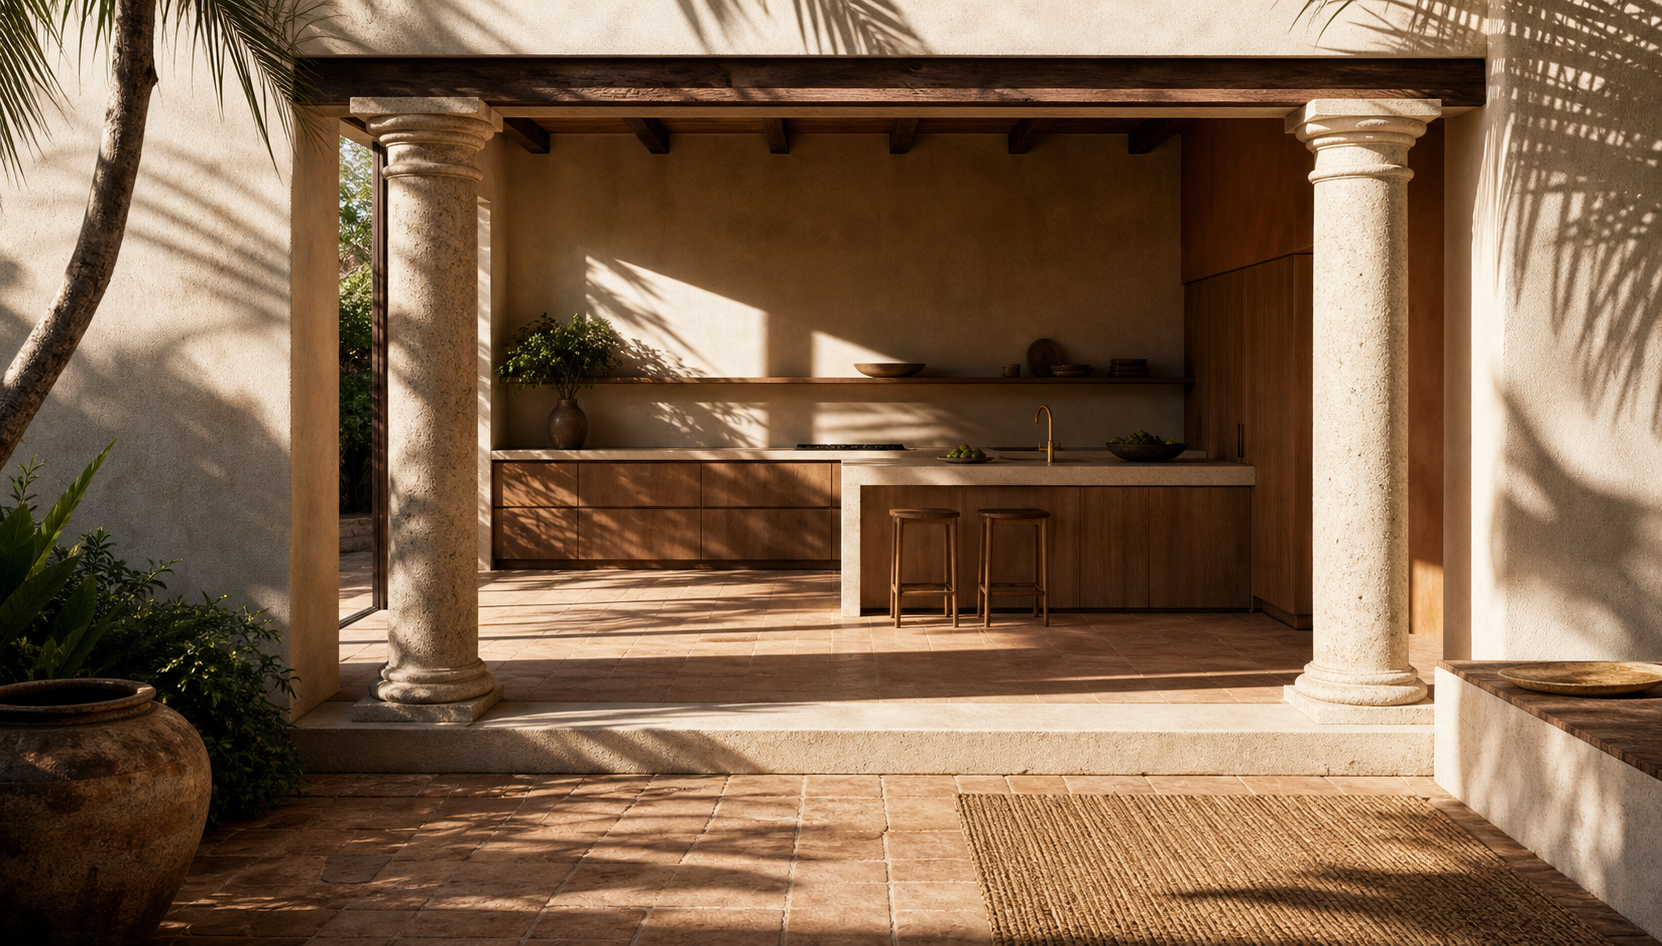
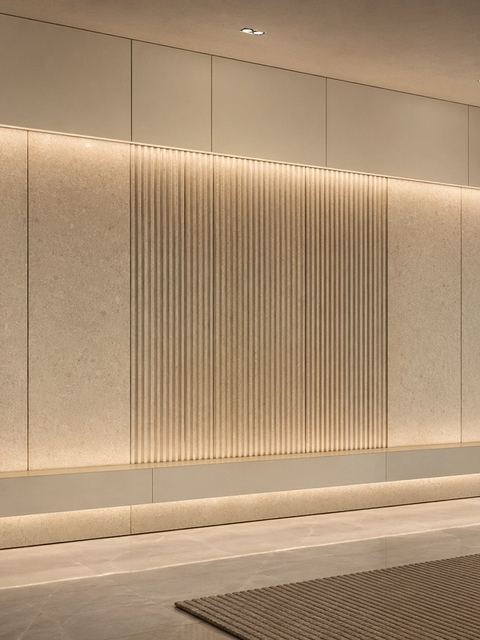
Which surfaces make a kitchen more camera-ready?
Surfaces become camera-ready when they hold a clean plane without feeling sterile. Highly reflective finishes can create glare and visual noise; overly matte finishes can look flat if the room lacks contrast. The strongest approach is a controlled mix: one quiet cabinet field, one counter surface with restrained movement, one warm tactile layer, and one accent tone used sparingly. This is why camera-ready planning should limit the number of dominant finishes before any accessories are chosen.
Fadior’s advantage is that the cabinet body is 304 stainless steel, while the visible surface can be finished in warm powder coat, wood-grain transfer, linen embossing, or pearl white. ASTM A240 covers chromium and chromium-nickel stainless steel plate, sheet, and strip for general applications, giving the material discussion a standards-backed reference point. In the home, the buyer does not need to see that standard; the buyer needs the result: a durable cabinet shell behind a finish language that can photograph softly instead of industrially.
- 304 stainless steel
- An austenitic stainless steel grade commonly used for food-contact and residential cabinetry applications where corrosion resistance, cleanability, and durability matter.
How does hidden storage protect the main camera angle?
Hidden storage is the difference between a staged image and a repeatable image. The main camera angle should not depend on clearing every object into another room. It should have planned homes for the items that normally break the visual line: countertop appliances, trays, paper goods, children’s bottles, chargers, cleaning cloths, and recycling. A camera-ready kitchen can have open shelves, but only if closed storage carries the real daily load.
The storage plan should begin with a visible-zone audit. Mark the first doorway view, the island-front view, and the dining-table view. Then assign every daily object either a closed cabinet, an appliance garage, a drawer, or a pantry cabinet outside those views. Fadior’s metal cabinet construction helps here because thin, stable planes can create precise storage walls without making the room feel bulky. The outcome is not minimalism for its own sake; it is lower friction. The room returns to order faster after real cooking.
Five checks before approving a camera-ready plan
- Confirm the first doorway view has fewer than 5 competing focal points.
- Keep the main working counter at least 900 mm visually clear in the hero angle.
- Review cabinet samples under the final lighting specification before sign-off.
- Assign closed storage for every appliance used more than 3 times per week.
- Keep one material family dominant across at least 60% of the visible cabinet field.
Does material choice affect visual calm and upkeep?
Material choice affects both the image and the daily maintenance burden. Serious homeowners ask what the cabinet body is made from, not only what the door looks like, because the hidden structure determines how the room handles moisture, cleaning, and repeated use. Fadior’s 304 stainless steel cabinet system avoids wood-based cabinet bodies and adhesive-heavy construction logic. That framing should stay practical: the cabinet structure is metal, the surface treatment is specified, and the room can be designed without relying on a fragile substrate behind a pretty face.
For camera-ready design, that matters because long-life materials make the image easier to maintain. A kitchen that resists swelling, moisture damage, and finish instability needs less visual repair over time. The most valuable photograph is not the launch image. It is the image the owner can still take after 5 years of cooking, cleaning, and hosting.
What should buyers ask before choosing an Instagram-ready kitchen?
Buyers should ask whether the room can stay composed without daily performance. The best question is not “Will this photograph well?” It is “Will this still photograph well after dinner?” That question exposes the real specification: lighting quality, storage discipline, cabinet material, counter durability, ventilation, electrical access, and finish repairability. A design that only works after a stylist clears the room is not a durable luxury decision.
The second question is whether the kitchen has more than one good angle. A strong plan gives the owner a doorway angle, an island angle, a dining angle, and a close material angle. If only one view works, the room may be hiding poor proportion. Fadior’s whole-home customization model helps because kitchen cabinets, wall panels, doors, wardrobes, and vanities can share one finish language across adjoining spaces. The social image then feels like part of the home, not a decorative scene isolated from the rest of the interior.
How does Fadior translate visual-first design into production?
Fadior translates visual-first design into production by treating the camera angle as an outcome of engineering discipline. The brand’s Foshan manufacturing base works from component-level records, CNC processing, surface treatment, and quality control before the finished room is photographed. The point is not to expose machinery in the published scene. The point is to make the room’s quiet lines repeatable across real orders.
A camera-ready kitchen design should therefore move through three approvals. First, approve the spatial composition: island, sightline, storage wall, and dining relationship. Second, approve the material board under real lighting: cabinet finish, counter, floor, wall, and accent tone. Third, approve the service logic: appliance access, cleaning clearance, hinges, drawers, power, and ventilation. When those three approvals line up, the final image can feel effortless because the difficult decisions were made before the room was styled.
When is a photogenic kitchen the wrong priority?
A photogenic kitchen is the wrong priority when it weakens the basic room. If the plan sacrifices ventilation, cleaning clearance, landing space, appliance access, or safe circulation for a single image, the buyer will eventually pay for the compromise. A kitchen is still a working room. The camera should clarify the design logic, not replace it.
The better priority is durable visual calm. In practice, that means a limited finish palette, measured light, concealed storage, serviceable construction, and materials that keep their appearance with normal care. That approach supports shareable images, sales conversations, family routines, and long-term product confidence without turning daily life into a styling exercise.
Frequently asked questions
What makes a kitchen camera-ready?
A kitchen becomes camera-ready when the main sightlines, light, cabinet rhythm, storage, and surfaces are planned before styling. The room should look composed from the doorway, island, dining table, and material-detail views without moving daily objects out of the frame every time.
Is an Instagram-ready kitchen only about decoration?
No. Decoration is the last layer. The durable work happens in layout, lighting, cabinet material, appliance concealment, and storage. A room that photographs well only after heavy styling is weaker than a room that returns to order after normal cooking and hosting.
Why does Fadior use 304 stainless steel in a photogenic kitchen?
Fadior uses 304 stainless steel as the cabinet body because it supports moisture resistance, cleanability, and long-life structure. The visible design can still be warm through color coating, wood-grain transfer, pearl white, PVD accents, stone counters, and disciplined lighting.
How many good camera angles should a luxury kitchen have?
A serious plan should have at least 4 usable views: doorway, island, dining, and material-detail. If only one view works, the design may depend on staging rather than proportion. Multiple angles prove that the room is coherent, not just photogenic from one corner.
What is the fastest way to improve a shareable kitchen plan?
Start with clutter control and light. Assign closed storage for daily appliances, reduce competing focal points, and review finish samples under the final lighting plan. Those steps usually improve both the photograph and the daily experience before any accessories are added.
References
Authoritative sources cited in this article
- Google image best practices
Image context, alt text, and file format guidance for visual discoverability.
Google Search Central image best practices
- DOE lighting principles
Color rendition and task lighting terminology for residential lighting decisions.
DOE lighting principles and terms
- DOE lighting design guidance
Layered efficient lighting guidance for frequently used kitchen and living spaces.
- ASTM A240 stainless sheet standard
Standard reference for chromium and chromium-nickel stainless steel plate, sheet, and strip.
ASTM A240/A240M standard page
- W3C image accessibility guidance
Accessible image text guidance for describing image purpose and context.
W3C WAI images tutorial
Editorial transparency
Yuki Tanaka is a composite editorial persona maintained by Fadior Home's editorial team. Articles attributed to this byline are produced through an AI-assisted editorial workflow with human review, and represent the consolidated voice of multiple researchers and contributors.
Ready to specify?