

How to Clean Kitchen Cabinets Without Damaging the Finish
A finish-safe cabinet cleaning routine for grease, fingerprints, interiors, and long-term kitchen maintenance.
Direct answer
The Direct Answer
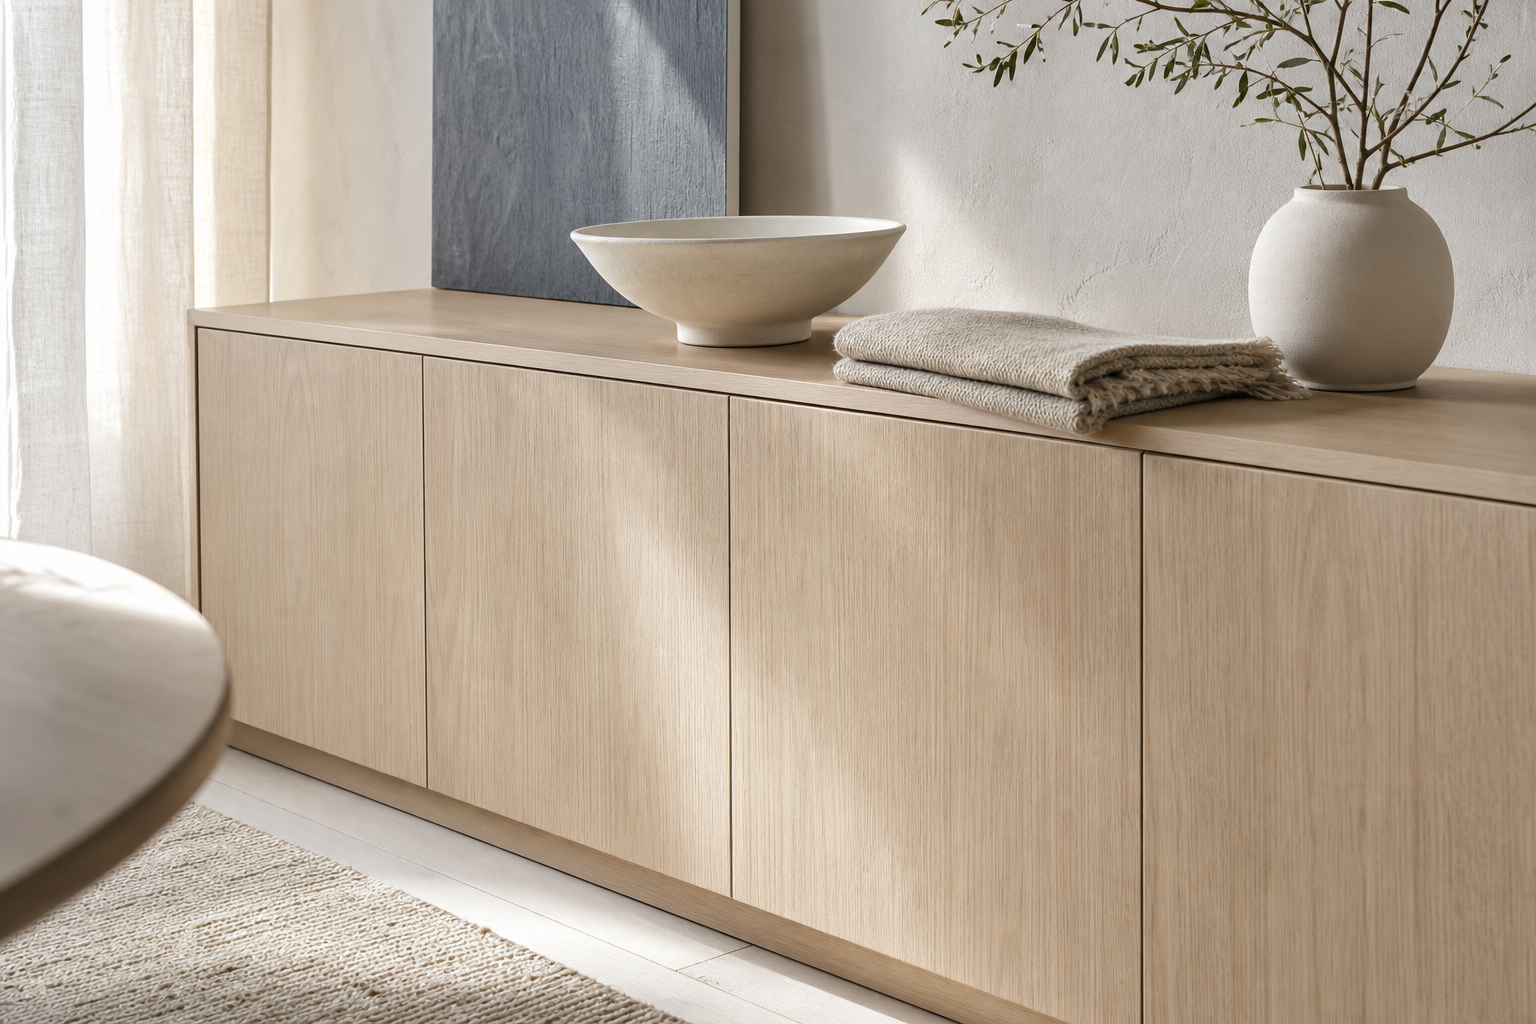
To clean kitchen cabinets safely, start with a soft dry wipe, then use a damp microfiber cloth with a small amount of mild dish soap for everyday grease. Work from upper cabinets down, keep water out of seams, rinse with a barely damp clean cloth, and dry immediately. Avoid abrasive pads, harsh powders, bleach-heavy mixes, and long soaking. For a premium kitchen, the best cleaning routine is not aggressive; it is frequent, gentle, and matched to the cabinet material and finish.
- cabinet-safe cleaning
- Cabinet-safe cleaning is removing grease and fingerprints without abrasion, finish dulling, edge swelling, or trapped moisture.
- degreasing
- Degreasing is the targeted removal of cooking oil residue from high-touch and cooking-adjacent cabinet surfaces using a cleaner mild enough for the finish.
What is the safest way to clean kitchen cabinets?
To clean kitchen cabinets safely, start with a dry microfiber cloth, then use a damp microfiber cloth with a small amount of mild dish soap. Work from upper cabinets down, keep water out of seams, rinse with a barely damp clean cloth, and dry immediately. This is the safest 1st pass because it removes loose dust before grease is moved around the surface. It also limits the 2 biggest cabinet risks: abrasion from grit and moisture sitting at edges. Most households do not need an aggressive cabinet cleaner every week. They need a repeatable routine that removes fingerprints, cooking film, and splashes before residue hardens. If a spot remains after 1 pass, repeat the mild pass before using a stronger product. That protects painted fronts, veneer, laminate, lacquer, and visible 304 stainless steel finishes from unnecessary wear. This small routine matters because cabinet cleaning is cumulative. A finish rarely fails from one careful wipe, but it can lose clarity after repeated harsh cleaning, trapped moisture, or old grease that requires force. Treat each cleaning pass as 3 checks: remove the soil, remove the cleaner, and remove the water. That sequence keeps the surface honest and gives homeowners a simple way to notice early problems before they become repair issues. In practical projects, this also gives the designer and homeowner a shared inspection language. If the cabinet is cleaned weekly but still feels sticky, the issue may be cooking ventilation, handle placement, or a finish that holds fingerprints. If the sink base repeatedly shows moisture, the issue is not cleaning discipline alone; it may be plumbing access, edge sealing, or cabinet body selection. A useful care guide should therefore connect routine wiping to specification decisions. That is why premium buyers should ask for cleaning instructions before the order is placed, not after the first stain appears.
How often should kitchen cabinets be cleaned?
A practical cadence is same-day spot cleaning for splatters, weekly wiping in cooking zones, monthly wiping across all exterior doors, and a deeper interior reset every 3 to 6 months. Homes that cook with oil every day, use the kitchen for family meals, or sit in humid climates may need the weekly zone wipe 2 times a week. Display kitchens can stretch the interval, but they still need dust removal because dust and airborne grease combine into a tacky film. The point is not to make cabinet care complicated. The point is to clean before grease becomes a restoration project. A 5 minute weekly wipe around the range, sink base, dishwasher, trash pull-out, and coffee station can prevent a 1 hour deep-clean later. This small routine matters because cabinet cleaning is cumulative. A finish rarely fails from one careful wipe, but it can lose clarity after repeated harsh cleaning, trapped moisture, or old grease that requires force. Treat each cleaning pass as 3 checks: remove the soil, remove the cleaner, and remove the water. That sequence keeps the surface honest and gives homeowners a simple way to notice early problems before they become repair issues. In practical projects, this also gives the designer and homeowner a shared inspection language. If the cabinet is cleaned weekly but still feels sticky, the issue may be cooking ventilation, handle placement, or a finish that holds fingerprints. If the sink base repeatedly shows moisture, the issue is not cleaning discipline alone; it may be plumbing access, edge sealing, or cabinet body selection. A useful care guide should therefore connect routine wiping to specification decisions. That is why premium buyers should ask for cleaning instructions before the order is placed, not after the first stain appears.
Which cleaner should you use for grease on cabinet doors?
For light grease, use warm water with a few drops of mild dish soap. For a heavier film, hold the damp soapy cloth on the spot for a short moment, wipe gently in overlapping passes, rinse with clean water on a separate cloth, and dry. Do not flood the door. If residue remains after 2 gentle passes, use a cabinet-safe degreaser recommended for the finish and test it in a hidden area first. Avoid harsh powders, rough pads, bleach-heavy mixtures, and strong cleaners that are not made for cabinet finishes. Grease zones are predictable: upper doors beside the cooktop, cabinet undersides near the range, lower drawers beside the oven, trash pull-outs, and the sink base. Those are the 5 zones to clean before the rest of the kitchen starts to look dull. This small routine matters because cabinet cleaning is cumulative. A finish rarely fails from one careful wipe, but it can lose clarity after repeated harsh cleaning, trapped moisture, or old grease that requires force. Treat each cleaning pass as 3 checks: remove the soil, remove the cleaner, and remove the water. That sequence keeps the surface honest and gives homeowners a simple way to notice early problems before they become repair issues. In practical projects, this also gives the designer and homeowner a shared inspection language. If the cabinet is cleaned weekly but still feels sticky, the issue may be cooking ventilation, handle placement, or a finish that holds fingerprints. If the sink base repeatedly shows moisture, the issue is not cleaning discipline alone; it may be plumbing access, edge sealing, or cabinet body selection. A useful care guide should therefore connect routine wiping to specification decisions. That is why premium buyers should ask for cleaning instructions before the order is placed, not after the first stain appears.
How do you clean painted, wood, laminate, and 304 cabinet surfaces?
Painted cabinet doors need gentle pressure because the color coat can polish, chip, or dull when rubbed too hard. Wood and veneer doors need a damp-not-wet cloth and immediate drying because finish breaks at seams and edges create risk. Laminate tolerates routine wiping well, but damaged edges can hold moisture. High-gloss lacquer needs clean microfiber and very light pressure to avoid swirl marks. A 304 stainless steel cabinet body changes the ownership logic because the body is washable, non-porous, and suited to high-use kitchens, but visible finishes still need soft cloths and non-abrasive care to control fingerprints and water marks. The correct routine is material-aware: 1 cleaner may be safe on a cabinet body but too harsh for a decorative face. This small routine matters because cabinet cleaning is cumulative. A finish rarely fails from one careful wipe, but it can lose clarity after repeated harsh cleaning, trapped moisture, or old grease that requires force. Treat each cleaning pass as 3 checks: remove the soil, remove the cleaner, and remove the water. That sequence keeps the surface honest and gives homeowners a simple way to notice early problems before they become repair issues. In practical projects, this also gives the designer and homeowner a shared inspection language. If the cabinet is cleaned weekly but still feels sticky, the issue may be cooking ventilation, handle placement, or a finish that holds fingerprints. If the sink base repeatedly shows moisture, the issue is not cleaning discipline alone; it may be plumbing access, edge sealing, or cabinet body selection. A useful care guide should therefore connect routine wiping to specification decisions. That is why premium buyers should ask for cleaning instructions before the order is placed, not after the first stain appears.
| Painted cabinet doors | Mild soap, damp microfiber, immediate dry | Scrubbing pads and harsh degreasers | Dulling around high-touch areas |
| Wood or veneer doors | Barely damp cloth, gentle wipe, dry quickly | Soaking edges or using steam | Moisture at seams and profiles |
| Laminate doors | Mild soap wipe, rinse, dry | Abrasive powders and exposed-edge soaking | Edge banding and chips |
| High-gloss lacquer | Fresh microfiber, low pressure, clean-water finish | Circular hard rubbing | Fine swirl marks |
| 304 stainless steel cabinet body | Soft cloth, mild cleaner, rinse, dry with grain-aware passes | Steel wool, chloride-heavy harsh products, abrasive pads | Fingerprints, water marks, finish direction |

Can you use vinegar, baking soda, or disinfectant on cabinets?
Vinegar, baking soda, and disinfectant sprays are not universal cabinet cleaners. Vinegar is acidic and can dull some finishes if used repeatedly or left wet. Baking soda is mildly abrasive and can mark glossy or coated surfaces when rubbed hard. Disinfectant may be appropriate for some high-touch points, but it should not become the daily finish cleaner unless the cabinet maker allows it. Separate cleaning from disinfecting in 2 steps. Clean grease and soil first. If there is a hygiene reason to disinfect a handle or touch zone, follow the product label, respect dwell time, and remove residue only if the surface guidance allows it. In a residential kitchen, routine cleanliness usually comes from frequent mild cleaning, not from stronger chemistry. This small routine matters because cabinet cleaning is cumulative. A finish rarely fails from one careful wipe, but it can lose clarity after repeated harsh cleaning, trapped moisture, or old grease that requires force. Treat each cleaning pass as 3 checks: remove the soil, remove the cleaner, and remove the water. That sequence keeps the surface honest and gives homeowners a simple way to notice early problems before they become repair issues. In practical projects, this also gives the designer and homeowner a shared inspection language. If the cabinet is cleaned weekly but still feels sticky, the issue may be cooking ventilation, handle placement, or a finish that holds fingerprints. If the sink base repeatedly shows moisture, the issue is not cleaning discipline alone; it may be plumbing access, edge sealing, or cabinet body selection. A useful care guide should therefore connect routine wiping to specification decisions. That is why premium buyers should ask for cleaning instructions before the order is placed, not after the first stain appears.
How do you clean inside kitchen cabinets?
Empty 1 cabinet zone at a time so the work stays manageable. Vacuum crumbs from corners, wipe shelves with a damp cloth, dry them, and check for leaks, sticky bottles, spice spills, and warped shelf liners. Avoid putting wet dishes, damp towels, or leaking oil bottles back inside. If a cabinet stores cleaning products, place them in a tray so 1 spill does not attack the shelf or side panel. Interior cleaning is where cabinet construction becomes visible. Low-quality shelf edges, exposed cores, and poorly sealed sink bases show stress first. A premium cabinet system should provide cleaning guidance, removable accessories where practical, and a sink-base strategy that anticipates water. For Fadior, the 304 stainless steel body supports that logic because the cabinet is designed for kitchens that are cleaned, used, and lived in. This small routine matters because cabinet cleaning is cumulative. A finish rarely fails from one careful wipe, but it can lose clarity after repeated harsh cleaning, trapped moisture, or old grease that requires force. Treat each cleaning pass as 3 checks: remove the soil, remove the cleaner, and remove the water. That sequence keeps the surface honest and gives homeowners a simple way to notice early problems before they become repair issues. In practical projects, this also gives the designer and homeowner a shared inspection language. If the cabinet is cleaned weekly but still feels sticky, the issue may be cooking ventilation, handle placement, or a finish that holds fingerprints. If the sink base repeatedly shows moisture, the issue is not cleaning discipline alone; it may be plumbing access, edge sealing, or cabinet body selection. A useful care guide should therefore connect routine wiping to specification decisions. That is why premium buyers should ask for cleaning instructions before the order is placed, not after the first stain appears.
What cabinet cleaning mistakes cause long-term damage?
The most common mistakes are soaking doors, using abrasive pads, ignoring finish guidance, letting grease harden around cooking zones, and closing cabinets while interiors are still damp. Steam cleaners are also risky around seams because heat and moisture can travel where a cloth cannot. Another mistake is using 1 dirty cloth across the whole room; once the cloth carries grit and oil, it stops cleaning and starts smearing. A final mistake is treating every cabinet material the same. Painted doors, wood veneer, laminate, lacquer, and 304 stainless steel cabinet bodies tolerate different cleaning pressure and moisture exposure. If a mark will not move with mild cleaner and patient wiping, pause and identify the finish before escalating. This small routine matters because cabinet cleaning is cumulative. A finish rarely fails from one careful wipe, but it can lose clarity after repeated harsh cleaning, trapped moisture, or old grease that requires force. Treat each cleaning pass as 3 checks: remove the soil, remove the cleaner, and remove the water. That sequence keeps the surface honest and gives homeowners a simple way to notice early problems before they become repair issues. In practical projects, this also gives the designer and homeowner a shared inspection language. If the cabinet is cleaned weekly but still feels sticky, the issue may be cooking ventilation, handle placement, or a finish that holds fingerprints. If the sink base repeatedly shows moisture, the issue is not cleaning discipline alone; it may be plumbing access, edge sealing, or cabinet body selection. A useful care guide should therefore connect routine wiping to specification decisions. That is why premium buyers should ask for cleaning instructions before the order is placed, not after the first stain appears.

What should luxury kitchen buyers ask before installation?
Cleaning should be discussed before the kitchen is built. Ask the supplier for a written material schedule, finish samples, cleaning guidance, warranty exclusions, and sink-base detailing. Ask how the door finish handles fingerprints, whether the cabinet body is moisture-sensitive, how interior accessories remove for cleaning, and what happens if a panel or finish is damaged. The best kitchen is not the 1 that looks perfect only on installation day. It is the 1 whose care routine matches the household. For families who cook often, entertain often, or live in humid climates, cabinet maintenance is a specification issue. 304 stainless steel cabinet construction changes the conversation because the body can handle routine cleaning and kitchen moisture better than wood-based cores. The design decision then shifts toward finish selection, layout, service, and daily ergonomics. This small routine matters because cabinet cleaning is cumulative. A finish rarely fails from one careful wipe, but it can lose clarity after repeated harsh cleaning, trapped moisture, or old grease that requires force. Treat each cleaning pass as 3 checks: remove the soil, remove the cleaner, and remove the water. That sequence keeps the surface honest and gives homeowners a simple way to notice early problems before they become repair issues. In practical projects, this also gives the designer and homeowner a shared inspection language. If the cabinet is cleaned weekly but still feels sticky, the issue may be cooking ventilation, handle placement, or a finish that holds fingerprints. If the sink base repeatedly shows moisture, the issue is not cleaning discipline alone; it may be plumbing access, edge sealing, or cabinet body selection. A useful care guide should therefore connect routine wiping to specification decisions. That is why premium buyers should ask for cleaning instructions before the order is placed, not after the first stain appears.
What is a simple weekly cabinet cleaning routine?
Begin at the cooktop wall. Wipe upper doors, the underside of nearby cabinets, and the first lower drawers with a damp soapy microfiber cloth. Rinse with a clean damp cloth and dry. Move to the sink base and dishwasher side, then the trash and recycling pull-out. Finish with pantry doors, coffee-zone doors, and any island panels touched by seating. Keep 2 cloths in the kitchen: 1 for cleaning and 1 for drying. Once a month, add the top edges, toe-kick area, and cabinet sides. Every season, empty the most-used interiors and check for spills. A written routine may feel ordinary, but it protects the budget. It also makes the kitchen feel better to use, because clean cabinet fronts change the sense of order in the whole room. This small routine matters because cabinet cleaning is cumulative. A finish rarely fails from one careful wipe, but it can lose clarity after repeated harsh cleaning, trapped moisture, or old grease that requires force. Treat each cleaning pass as 3 checks: remove the soil, remove the cleaner, and remove the water. That sequence keeps the surface honest and gives homeowners a simple way to notice early problems before they become repair issues. In practical projects, this also gives the designer and homeowner a shared inspection language. If the cabinet is cleaned weekly but still feels sticky, the issue may be cooking ventilation, handle placement, or a finish that holds fingerprints. If the sink base repeatedly shows moisture, the issue is not cleaning discipline alone; it may be plumbing access, edge sealing, or cabinet body selection. A useful care guide should therefore connect routine wiping to specification decisions. That is why premium buyers should ask for cleaning instructions before the order is placed, not after the first stain appears.
How does Fadior approach cleanable kitchen design?
Fadior frames cabinet cleaning as part of design performance. The company uses 304 stainless steel cabinet construction for kitchens, wardrobes, baths, and outdoor-adjacent living because the material supports a washable, durable, low-maintenance cabinet body. That does not mean every finish should be scrubbed aggressively. It means the hidden structure is designed for long service, while the visible finish can be cared for with a clear, gentle routine. For buyers, the practical takeaway is to ask for beauty and maintenance clarity together. A kitchen should come with a finish story, a cleaning story, and a service story. If those 3 are aligned, daily care becomes simple: wipe early, avoid harsh tools, dry thoroughly, and choose materials that fit the way the household actually cooks. This small routine matters because cabinet cleaning is cumulative. A finish rarely fails from one careful wipe, but it can lose clarity after repeated harsh cleaning, trapped moisture, or old grease that requires force. Treat each cleaning pass as 3 checks: remove the soil, remove the cleaner, and remove the water. That sequence keeps the surface honest and gives homeowners a simple way to notice early problems before they become repair issues. In practical projects, this also gives the designer and homeowner a shared inspection language. If the cabinet is cleaned weekly but still feels sticky, the issue may be cooking ventilation, handle placement, or a finish that holds fingerprints. If the sink base repeatedly shows moisture, the issue is not cleaning discipline alone; it may be plumbing access, edge sealing, or cabinet body selection. A useful care guide should therefore connect routine wiping to specification decisions. That is why premium buyers should ask for cleaning instructions before the order is placed, not after the first stain appears.
Related products
Specific products worth reviewing next.


References
Authoritative sources cited in this article
- https://www.marthastewart.com/how-to-clean-kitchen-cabinets-11735647
- https://www.realsimple.com/home-organizing/cleaning/how-to-clean-kitchen-cabinets
- https://www.thespruce.com/how-to-clean-kitchen-cabinets-1900632
- https://www.bhg.com/homekeeping/house-cleaning/surface/how-to-clean-kitchen-cabinets/
- https://www.fadiorhome.com/products
Editorial transparency
Adriana Hale is a composite editorial persona maintained by Fadior Home's editorial team. Articles attributed to this byline are produced through an AI-assisted editorial workflow with human review, and represent the consolidated voice of multiple researchers and contributors.
Ready to specify?